|
Kitchen Remodeling - Day 420: We finally installed the back splash behind the new counter top. 0. DESIGN: We spent months putting off the back splash project because we were indecisive. Scott had always talked about subway tiles, but there were so many distracting design options in the tile stores and design catalogs (i.e. ceramic tiles, stone tiles, glass tile, etc., etc.). We spent a long time going over the possibilities. There were many modern and stylish options, but we didn't want to do something trendy that would become dated and not match the house's age. Even though we plan on staying in the house a long time, we continue to be mindful that installing something too edgy/modern might turn-off potential buyers. We started buying samples about a month ago such as the subway tile and a sheet of colored glass tiles. However, I was very apprehensive about installing a color that we would be stuck with for years since changing tile is not as easy as painting. Eventually, we went back to Scott's original idea of classic white subway tile with a simple white trim row. 1. WALL PREPARATION: When we finally bought the tile, we were delayed a week just to prepare the walls. Most of the wall was new wall board; however, the baseboards were missing and the window trim wasn't right. A chunk of the left baseboard was torn out during the wall demo and the entire right baseboard was missing. Also, a prior owner cut into half of the window trim to install the previous linoleum back splash. It was surprisingly simple to replace the missing baseboards and window trim. I also found some handy extenders for the three electrical receptacle boxes. I understand that code requires that no gaps can be in the box, so the extenders were a good solution other than ripping open the wall and repositioning the boxes. 2. CUTTING AND SETTING TILE: Figuring how to cut the tile was the most difficult aspect of the project. Since subway tile is relatively small and thin, we figured that we did not need to rent or buy a tile saw. However, we did buy a RotoZip for the L-shape cut-outs. It took me a few days to figure out how to assemble the RotoZip and the best way of making cuts. Eventually I learned that I could make the straights cuts by pulling it toward myself. Although the RotoZip was handy, it is still a hand tool that isn't great for long, straight cuts. The most frustrating part of tile cutting was trying to consistently cut tiles lengthwise at the same height with the snap cutter. We'll definitely consider using a tile saw for the remaining tile projects. Aligning the tiles and spacers was tedious. We used the countertop as the reference for most of the first row of tiles, which worked well except above the sink. The area above the sink was tricky because we had to cut the most important first row of tiles, which came out a bit too low. It doesn't look awful and isn't worth tearing out and redoing, but it is noticeable if one studies the grout lines. It is bothersome to us because we know the defect is there, but I'll try to keep myself from pointing out the flaw to everyone. The top row under the wall cabinets was probably the worse because it borders the wallboard and plaster seam. Fortunately, it's hard to see unless you're sitting down or stick your head under the cabinets. |


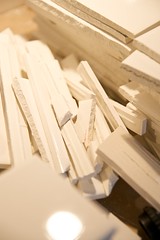

3. GROUTING We procrastinated much of Sunday before doing the grout. We were both apprehensive about grouting. So, instead of just buying the grout, we went on a shopping spree to three other stores. However, we eventually came home a got the grout. Surprisingly, it wasn't difficult at all. It was messing, but clean-up was easy. The white grout made a huge difference in hiding all the little defects. Had I known what a difference it would have made, I would have grouted much sooner.
In a perfect world, we would have removed the cabinets and plaster, installed new wall board, tiled, and reinstalled the cabinets. However, considering that we did all the work on the weekends and while still using the kitchen, it still came out great. We just need to seal the grout. For some reason, the guide says we need to spray water on the grout for three days before sealing.
Next Projects: Tiling the back splash on the stove wall and then kitchen flooring. We're leaning toward hex floor tile with grey grout, but that may require too much upkeep for a kitchen. We found some neat ideas online, but we haven't found a local supplier for black hex tile. We're also considering other options such checkerboard tile or Marmoleum, but hex tile seems to be the direction we're going since it is already in the bathroom.
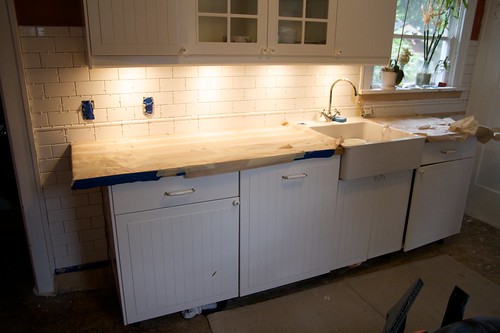 finito, originally uploaded by sweber4507. We placed tiles working left to right figuring the wall area next to the left doorway would be the most visible. Our first day cutting and setting tile went very fast and we made it all the way to the sink. However, it took us two partial days to cut and set the tiles under the window to the wall. There were a lot of small frustrating cuts, the wall was very uneven as it transitioned from drywall to plaster, and all the tiles at the corner had to be custom sized as the adjoining wall is not straight. |
|
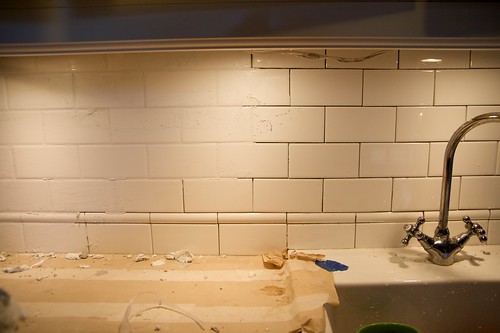 GroutinProgress, originally uploaded by sweber4507. Wow, grout makes a huge difference. We briefly considered gray grout, but the white really helps hide all of my bad cuts and uneven tiles. |
|
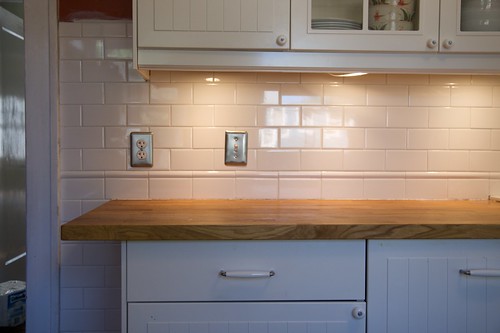 backsplashandhall, originally uploaded by sweber4507. Danaya will be very happy that we finally screwed the electrical receptacles in and put covers on. She scolded me for leaving the receptacles hanging out of the walls for so long. I got slightly over-sized receptacle covers to hide any bad cuts, but normal sized covers would have worked fine too. |
No comments:
Post a Comment